Attention to detail is imperative within the print process. When it comes to bleed small errors can have a huge impact. Do you know how to apply bleed properly for the best results?
What is Bleed?
When any image, element or background colour on a page touches the edge of the page then you will need to apply bleed to it. When you extend colour or image beyond the edge, leaving no margin it is said to bleed.
It may bleed or extend off one or more sides. Photos, patterns and solid colours can bleed off the page. You will need to add bleed to each side that your artwork touches. For instance if you have a solid colour background on your artwork you will need bleed on all four sides, or if you have an image touching just one side you need to bleed it off just that one side.
How to apply bleed
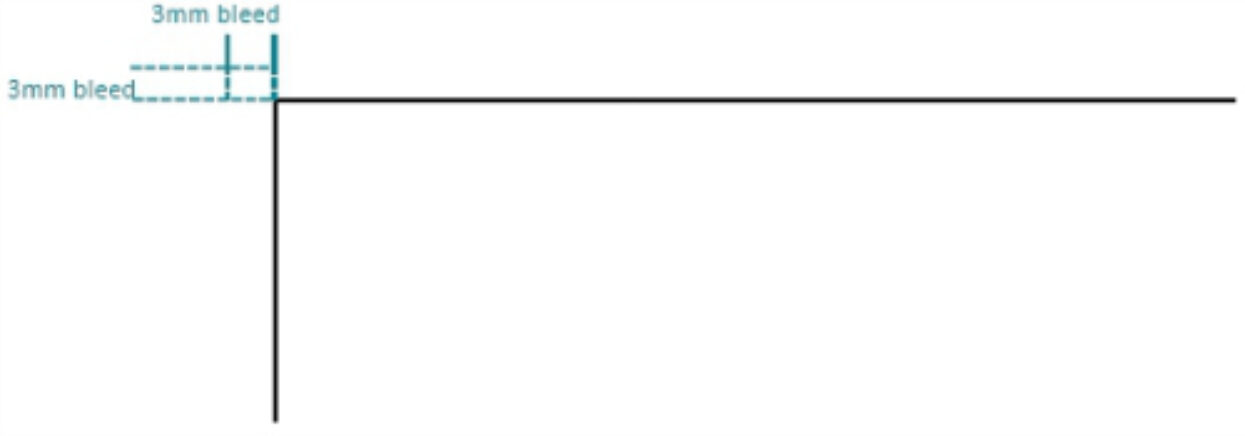
Bleed is artwork that is extended beyond the actual dimensions of the document. It is used to avoid strips of white paper showing on the edges of your print when cut to size. If a document has no bleed and the trimming is out by 0 5mm then you will end up with a white strip. If a document has no bleed and the trimming is out by 0.5mm then you will end up with a white strip. That is why we recommend adding bleed to all documents. For printing a bleed of 3mm is required. Depending on what program you are using, you may be able to apply bleed as you are saving as a PDF, in other programs that do not have that option namely Word, Powerpoint and Photoshop you will need to set up the page size as slightly larger to allow for the bleed.

General rule of thumb:
Programs with bleed settings: Drag your colour, image or pattern 3mm over the edge where the document ends, so it extends outside the page. Then when you export or save as a PDF choose 3mm bleed settings.
Programs without bleed settings: 3mm bleed accounts for each of the four sides of the page
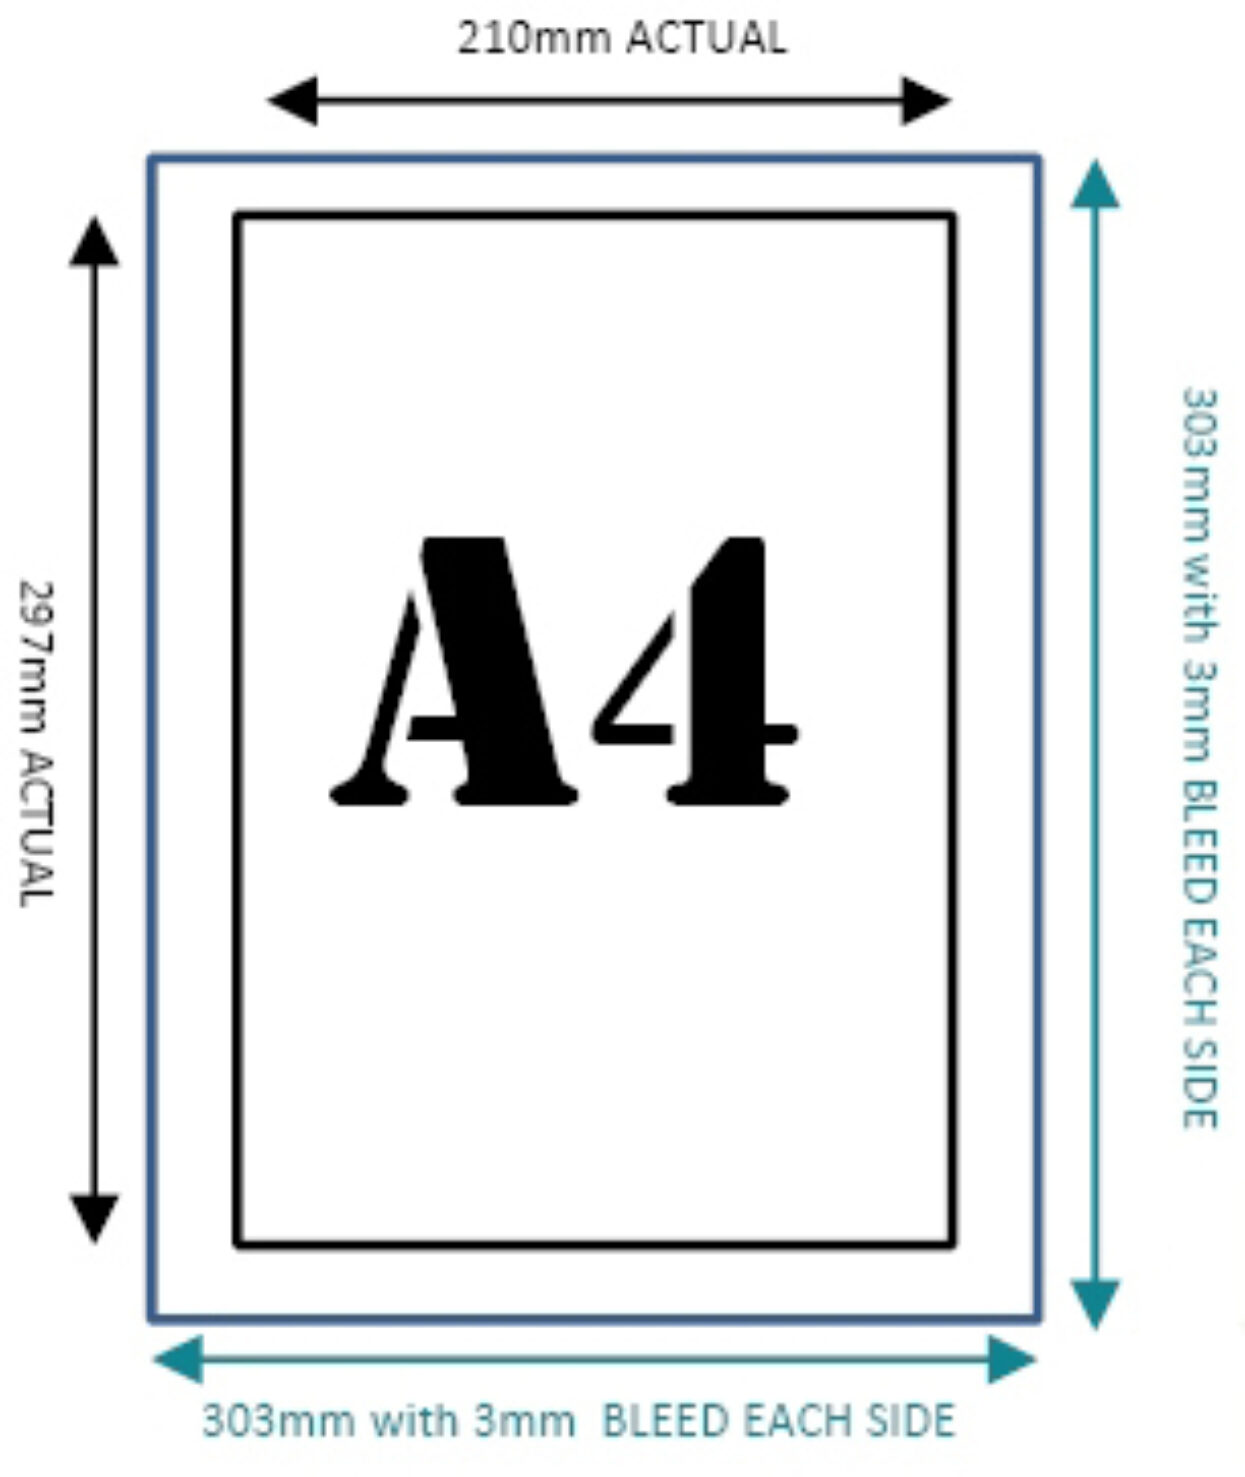
Therefore you should add 6mm to the width and 6mm to the height of the document. For example:
A4 paper = 210mm x 297mm
210mm + 6mm = 216mm
297mm + 6mm = 303mm
Total paper size = 216mm x 303mm

Margins
In addition to bleed, you should also add a margin to the edges of the document to avoid having your objects look as if they are about to fall off the page, or get cropped off when the document is trimmed. The amount of margin is personal preference, but 3mm is usual.

Crop marks
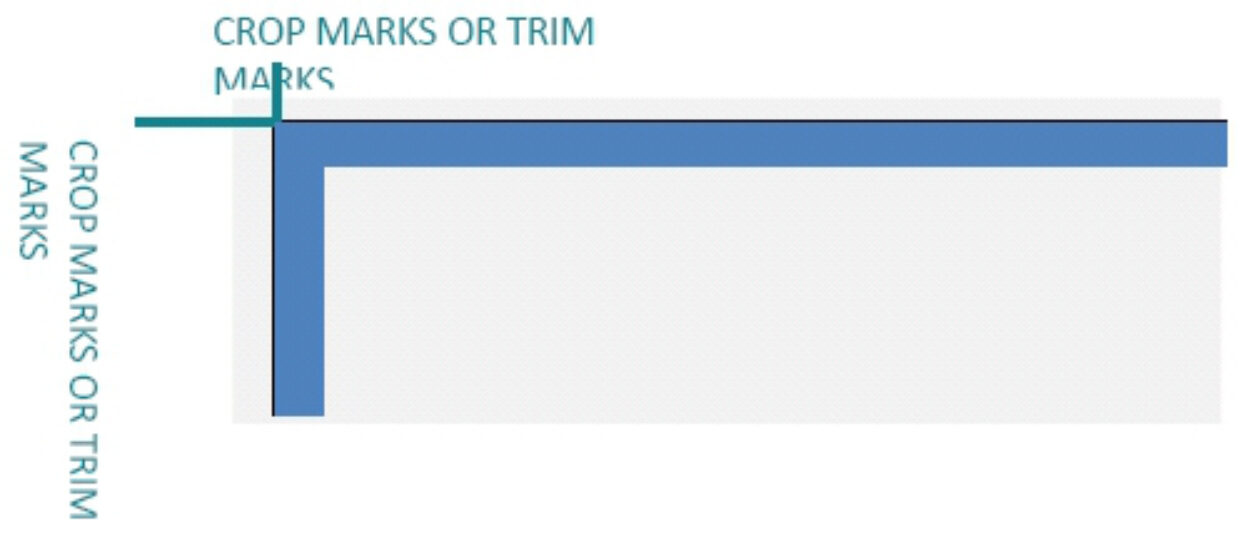
Crop marks are the little lines that sit around the edge of the document showing where the area of bleed ends and the proper document area begins. They work alongside bleed to tell the printer where the paper needs trimming. Crop marks are usually hairline or 0.25pt in thickness and are set in Registration Black. Crop marks are applied when you save as a PDF. Make sure to select “apply crop marks or trim marks” before saving. 3mm bleed 5mm margin.

Illustrator
- File > Save As > format: Adobe [PDF]
- Adobe PDF Preset: [PDF/X-1a:2001]
- Select ‘Marks and Bleeds’
- Tick ‘Trim Marks’
- Under ‘Bleeds’ enter 3mm to each (top, bottom, left and right)
- Save PDF
In Design
- File > Adobe PDF Presets > [PDF/X-1a:2001]
- Save
- Select ‘Marks and Bleeds’
- Tick ‘Crop Marks’
- Under ‘Bleeds’ enter 3mm to each (top, bottom, left and right)
- Export
Adobe Photoshop
- File > Print
- Select ‘Output’ from the drop down menu
- Select ‘Corner crop marks’
- Click on ‘Bleed’ > 3mm
- Done
- File > Save As
- Photoshop PDF (un-tick layers if this is ticked) >
Save 8 Adobe PDF Preset: [PDF/X-1a:2001] > Save PDF
Photoshop tip: Do not flatten your files. This will rasterize your artwork and may cause text to blur.
Quark Xpress
- Export layout as PDF
- PDF style > Options
- Under ‘Bleeds’ enter 3mm to each (top, bottom, left and right)
- Save
Word
- File > Print
- Select ‘Paper Size’ > More paper sizes
- Choose from the preset list or enter custom size
- OK > File > Print
This article appears courtesy of Printwell