What to do if an image your customer really, really wants to use is one you know will look awful at the desired enlargement factor? Simon Eccles finds out more.
Very large custom printed murals, soft signage lightboxes and wallpaper are increasingly popular applications of large format graphics. Done properly, they can look stunning as posters, murals and wallpaper. However, unlike the images on billboards and many posters, these graphics are often viewed very close-up, whether by intention or accident.
This means that designers need to pay particular attention to original image resolution, because a picture that looks great on-screen may end up as a jagged mess when blown up to cover a wall. It’s not an issue of large format inkjet printers producing relatively low print resolutions, as most of them are more than good enough for mural work, provided the original image file is fit for the purpose.
In this pair of stories we’ll look at why photographic images may not work at very large sizes, and how to work with photographers and designers to ensure that the images supplied have the best chance of looking good. What to do if an image your customer really wants to use is one you know will look awful at the desired enlargement factor?
First of all, ask if that is the original image file, and if not could you have it please? That may work as long as there hasn’t been image editing applied to the low res but not the high res.
If there’s no better resolution image available, you should explain that it’s going to look horrible if you print it as-is, but there are some techniques you can use to improve it. To back this up without going to the expense of printing whole murals to prove your point, use a small desktop printer to output small sections of important details in the image at the same magnification factor, to show what it will look like before and after you’ve applied your magic touch.
Then tell them how much you’re going to charge to make it better, and hopefully they’ll send you a better image next time.
Here are some workarounds. Part 1 here looks at the issues of image resolution in photographs, while Part 2 looks at “artefacts,” and how to control them.
Why pixels matter

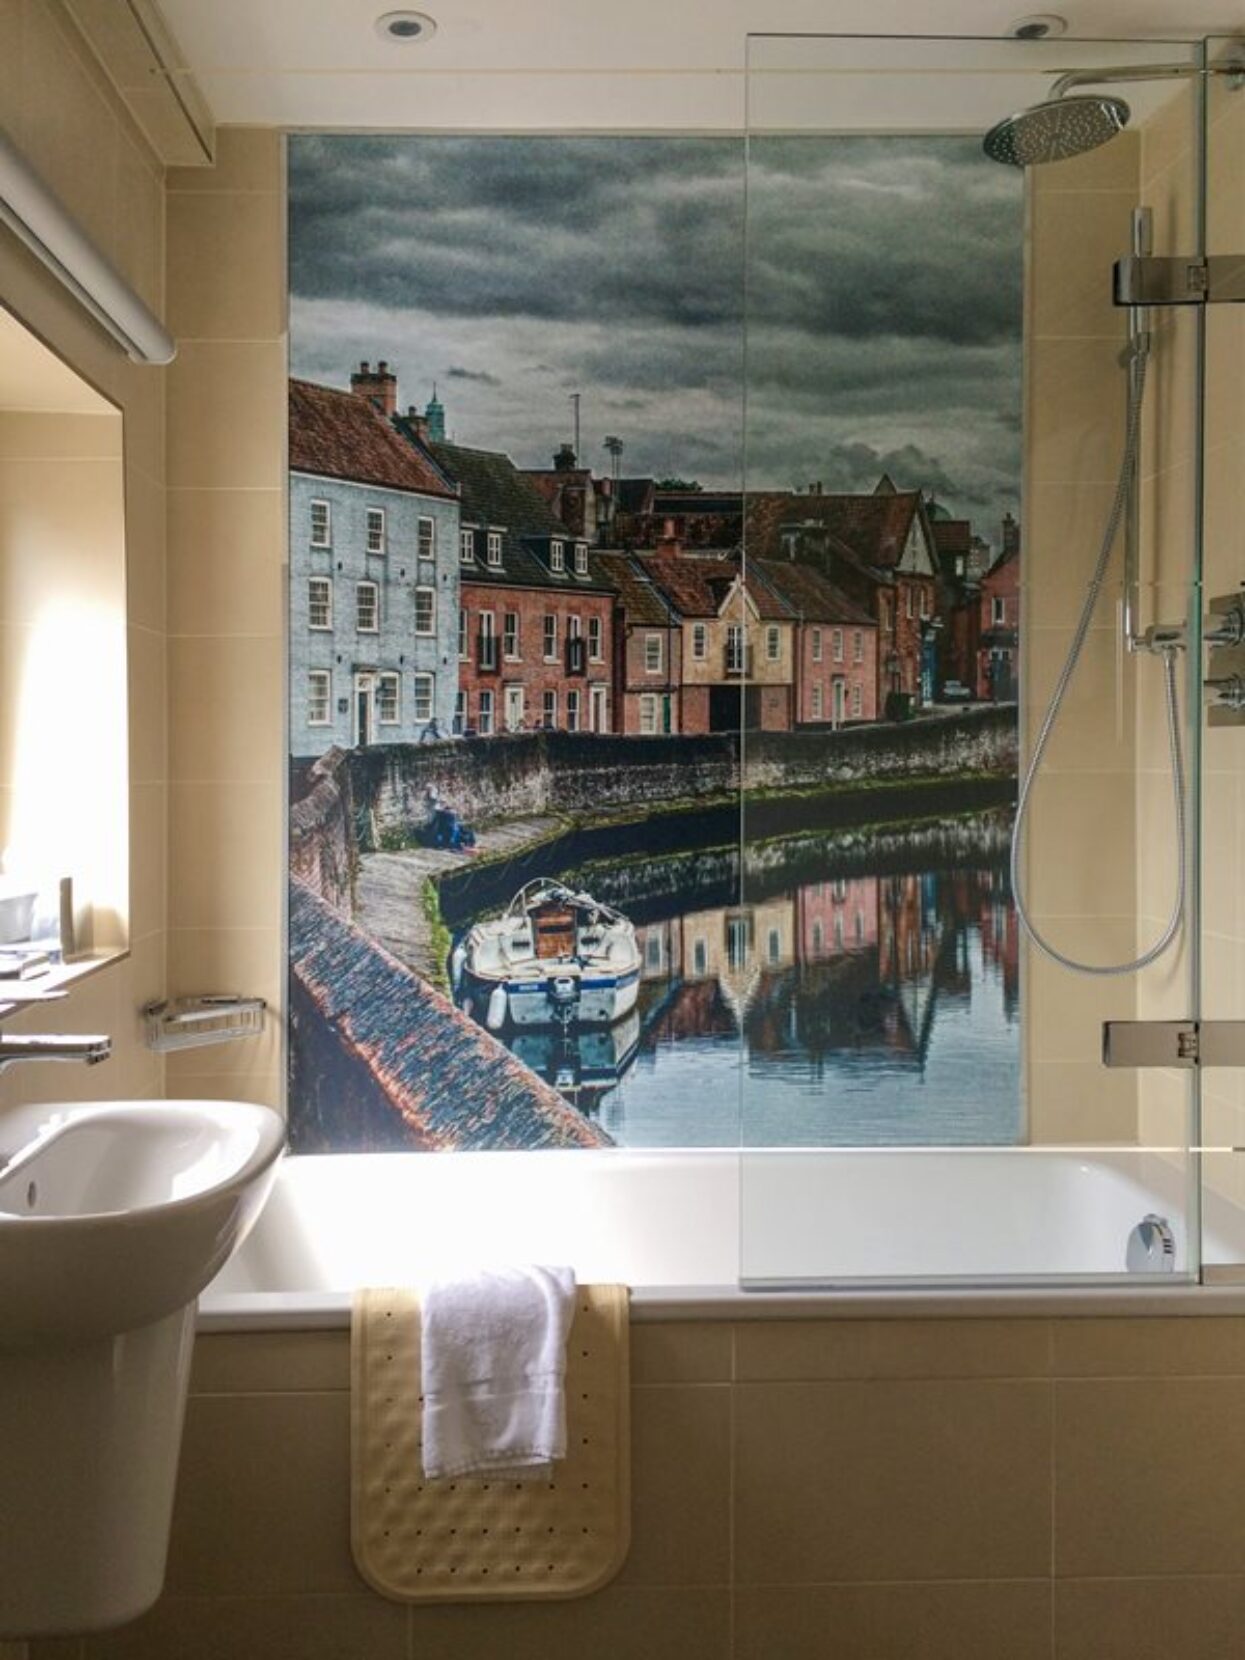
The mural looks great from the opposite side of the bathroom.
A recent stay in a hotel in England provided a prime example of a great idea that could have been even better. The hotel had recently installed large format murals printed onto 2 metre high plastic panels over the baths in its rooms.
There were six different local scenes and if you could tick them all off you could win a free night. It wasn’t clear whether you were expected to get on friendly terms with five or more other guests so you could inspect their bathrooms too.
Although the printing and installation were excellent, the panels were installed on the wall next to the bath, certainly in my room. From across the bathroom the image looked great. But when using the bath or shower, your eyes were about 30 to 40 cm from the mural.
From that distance the square pixels forming the original digital image were very obvious – they were only about 1 mm square but the artefacts of file compression and enlargement made them much more obvious than you’d expect.
Providing very fine detail that works at all distances on a mural isn’t easy to achieve (though not impossible using gigapixel multi-image stitching techniques and consequently enormous files in the gigabyte range – see www.gigapan.com for more).
However there’s a happy medium that uses more conventional images but minimises the pixels so you’re less aware of them close up. This produces what most people would consider “good enough” image quality when viewed close up, and excellent quality from a distance.
Start with the right resolution
The problem is that photographers and designers often still don’t really have a grasp of the relationship between the original pixel count of an image, what it looks like on a computer screen, and then the actual resolution when it’s printed at the final size.
The best start is to make sure you have plenty of resolution to start with. Nearly all modern digital cameras and even most mobile phones have enough resolution to print up to A3 size without any quality problems, Many modern digital SLR cameras capture 24 million pixels, usually as a grid of 6,000 x 4,000 pixels. Some can capture 32 or 50 million pixels, but they’re rarer and very expensive.
If a 24 mp image had been used uncropped for our 2 m bathroom mural then the final resolution would have been 3 pixels per mm (which works out as 76.2 dpi), which my tests indicate would have looked a little blurred in close-up, but not obviously pixelated.
The actual original image on the hotel bathroom mural must have been about 2,000 pixels high, so probably about 1,300 pixels wide for an original resolution of 2.6 megapixels. This is roughly the resolution of a ten year old mobile phone, so presumably the original had been cropped or someone really didn’t understand how resolution works in print.
In case anyone thinks I’ve picked a one-off unfortunate example with the bathroom, I recently saw something with almost identical resolution on an A2 POS poster intended for close-in viewing at my local Tesco, part of the UK’s largest retail chain, with a huge promotional budget.
Checking enlargements
We all know that customers are always right, but you can also try to educate them so what they supply is actually going to work at high enlargement. Most of their designers will have Photoshop or equivalent, so the easiest way to help them is to tell them where to look.
Alternatively you can fix it inhouse, having hopefully negotiated an extra corrections fee with the customer.
Here is how to check and fix resolutions, with instructions for any recent version of Photoshop including the latest CC 1017.
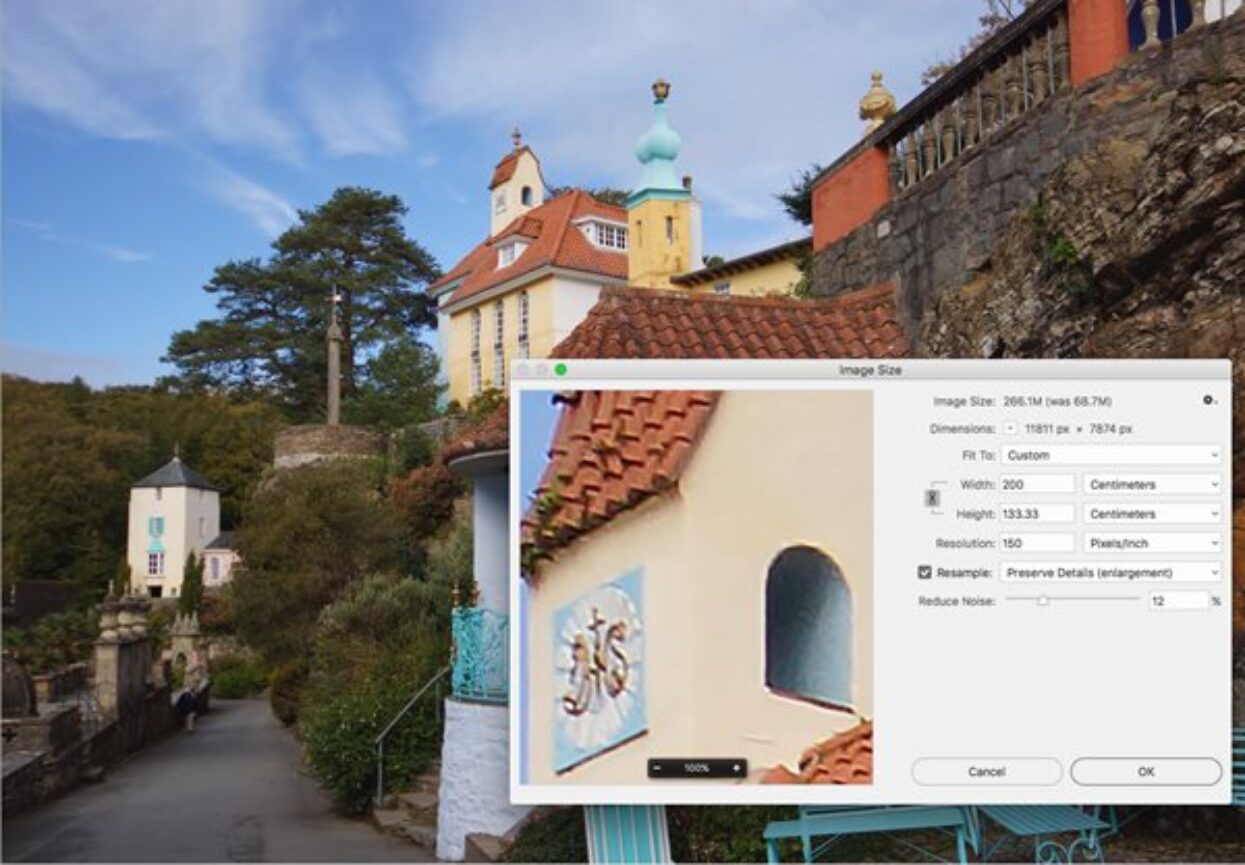
It’s best to work on a copy of the image in case of mistakes. First, crop the image to the view you want to print. Then go to the Image/Image Size menu (pictured). Note that it tells you how many pixels there are at the top.
Make sure that the Resample tickbox is deselected (untick). Now type in the final image size – either the height or width, in whatever units are displayed next to the box. This will then display the final printed resolution in “dpi” which is actually pixels per inch. You can switch the display to cm if you prefer.
In our example, an uncropped 24 mp landscape image will print at 76.2 dpi if enlarged to 2.0 m width, or 50.8 dpi for a height of 2.0 m. This is probably enough for most needs. Ideally you’d print photographs at 360 dpi or so for small print, but that would mean your 24 mp image end up with a file size of 1.04 GB. This would really slow down the printer Rip for no particular advantage. A compromise might be 150 dpi, which gives a 266 MB image file with a width of 2.0 m.
Resizing

Setting up a 2 metres wide print in Photoshop. The 24 megapixel image is being resized to output at 150 pixels per inch.
The process of adding extra pixels to increase the resolution of a photograph is usually called resampling or interpolation. Photoshop’s Image Size menu includes controls for enlarging or reducing pixel counts while attempting to avoid artefacts such as jagged diagonal lines and posterisation of tones.
To enlarge, make sure the Resample tickbox is selected (ie ticked) and type in both your desired final print size and the desired resolution (eg 150 dpi). if your version of Photoshop is fairly recent it will show a pull-down menu with a list of options. For enlargement it offers “Bicubic Smoother” or “Preserve Details.”
Which one to choose depends on the image content, so you can experiment with the preview. Preserve Details may put pixelating noise into skies or faces for instance, but it offers a slider to try to reduce this.
When you’re happy, click OK, and the result will be a higher resolution file but also a larger file size.
A few years ago there was a healthy market for image enlargement programs such as Genuine Fractals, which were often used for large format prints. These use clever mathematical tools, but have become less necessary because Photoshop’s built-in interpolation is now good enough for most people. A few online free image resizing sites exist, but they’re mainly intended for scaling large pictures down to small for online or mobile devices.
On1 still sells a current development of Genuine Fractals, now called Resize 10, for about €72. It will run on its own or as a plug-in to Photoshop. Apart from the enlargement and enhancement tools, it also has large format friendly features including a Gallery Wrap edge extender and a way to split images into separate tiles for multiple side-by-side prints. It also has hundreds of presets for different printer/size combinations.
It has to be said that you have to look hard to see any quality difference between Resize and what Photoshop CC 2017 can do as standard when enlarging, but some people say it works better when halftoned for printing.
The relatively recent trend for low cost downloadable apps for mainstream computers (not just phones) has seen the introduction of Serif Software’s Affinity Photo for MacOS and Windows. This costs just €56 outright and is a credible alternative to Photoshop with support for CMYK, ICC colour management and so on.
The latest version 1.5 has improved interpolation tools and now uses techniques including Nearest Neighbour, Bilinear, Bicubic, Lanczos 3-taps (separable and non-separable). Lanczos is said to be the sharpest for enlargement. It can handle enormous files up to 256,000 x 256,000 pixels, the theoretical limit for 16-bit precision, equating to 65,536 megapixels.
That’s enough for an 18 metre banner at 360 dpi, though finding anything to handle the file sizes would be a challenge. Photoshop is claimed to go up to 300,000 x 300,000 pixels, though both these counts are likely to be academic in the real world.
Source images

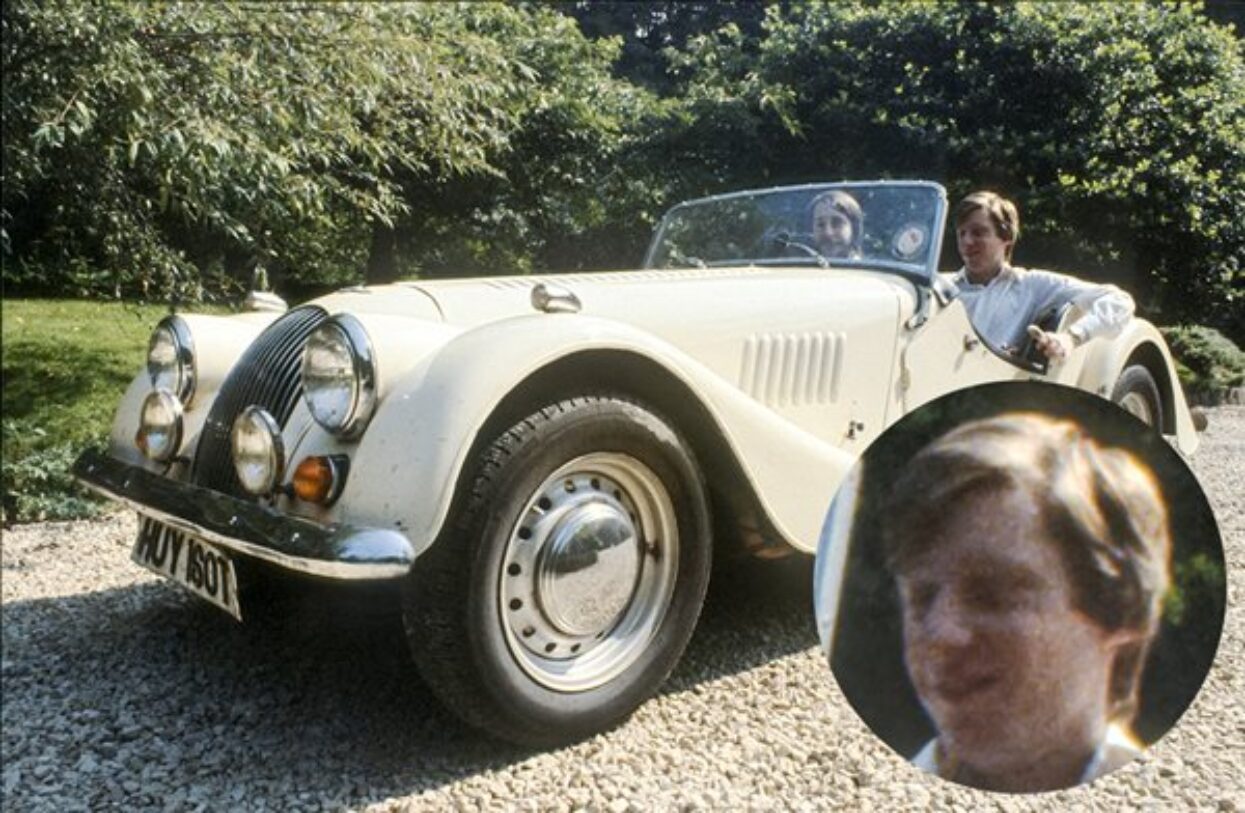
This scan from a 35 mm original transparency shows film grain which would be apparent in a large format print.
In today’s world of print many photographs will have been taken on digital cameras, and our story here mostly assumes that. However, there are still a lot of images in libraries and personal collections that started life as film negatives and positives, or prints.
We’re not going to go into issues of how to scan them here, but it’s worth noting that these have the same resolution issues as digital camera issues. If it’s a library stock shot, you’re stuck with what the original scanner was set to, but if you’re scanning a film or print original especially for your project, then ask for a high resolution setting.
Film has grain which becomes visible in very high resolution scanning and while it’s evocative for some uses, it may be less wanted in others. A resolution setting that doesn’t reproduce the grain (or slightly blurs it at the Photoshop stage) may be desirable.
Likewise small photographic prints often have far less detail than the original film, so you’ll never get fine results from a scan no matter what the resolution. On the other hand larger format prints (10 x 8 or 16 x 20 inches, say) often scan better than small format films. Desktop A4 scanners can take up to 10 x 8 inch prints, but you may need a specialist large format scanner or overhead camera rig for anything larger.
Retail stores often like to reproduce old photographs from newspapers showing their local areas in the past. These are a special case and we’ll look at them separately in the next story on artefacts.
In the next story we look at layout files plus unwanted image artefacts, and how to avoid them, why vector graphics work at any enlargement size, and have a bit of fun with old halftones.